NearSync App Settings & Adjustment Guide
Fine-tune your camera's picture in NearSync — brightness, contrast, saturation, hue, and anti-flicker frequency — and restore defaults with one click.
NearSync lets you fine-tune your camera's picture for your room's lighting. Use this guide when the default image does not look right — too dark, too blue, washed out, or flickering.
Before You Begin
- Connect your camera to NearSync via USB cable (see How to Connect Your Device to NearSync)
- Select your camera in the device list on the left
Find the Settings Pages
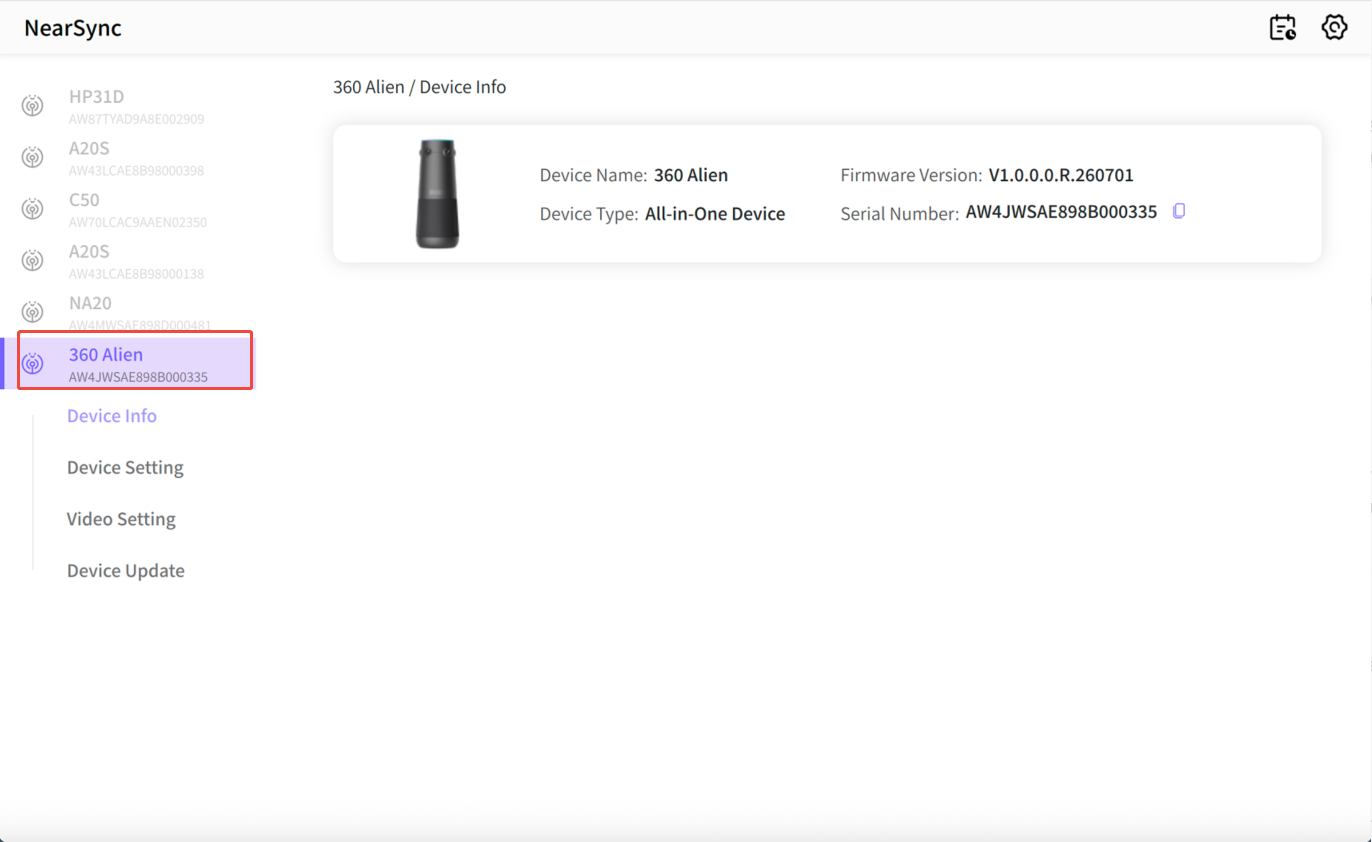
With your camera selected, the left menu shows four entries: Device Info, Device Setting, Video Setting, and Device Update. Picture controls live under Video Setting.
Adjust the Picture (Video Setting)
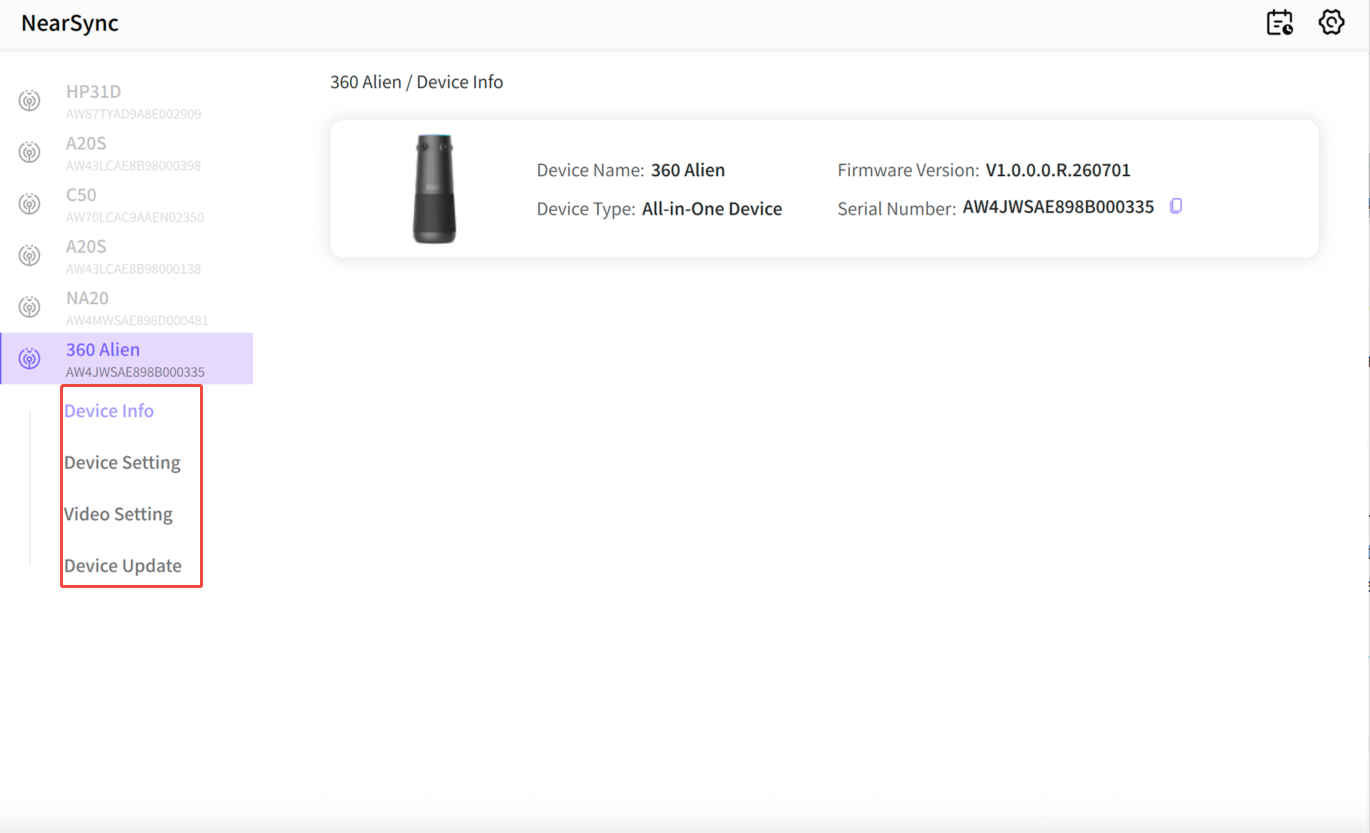
Open Video Setting. You will find four sliders and one frequency option:
- Brightness — raise it when faces look dark, for example against a bright window.
- Contrast — raise it when the picture looks flat or washed out; lower it when shadows look harsh.
- Saturation — adjust when colors look dull or overly vivid.
- Hue — adjust when the whole picture has a color cast. If the image looks too blue under daylight, move Hue slowly until whites look neutral.
- Frequence — set to your local mains frequency: 60 Hz in the US, 50 Hz in Europe and most of Asia. The wrong setting causes flicker or moving bands under fluorescent or LED lighting.
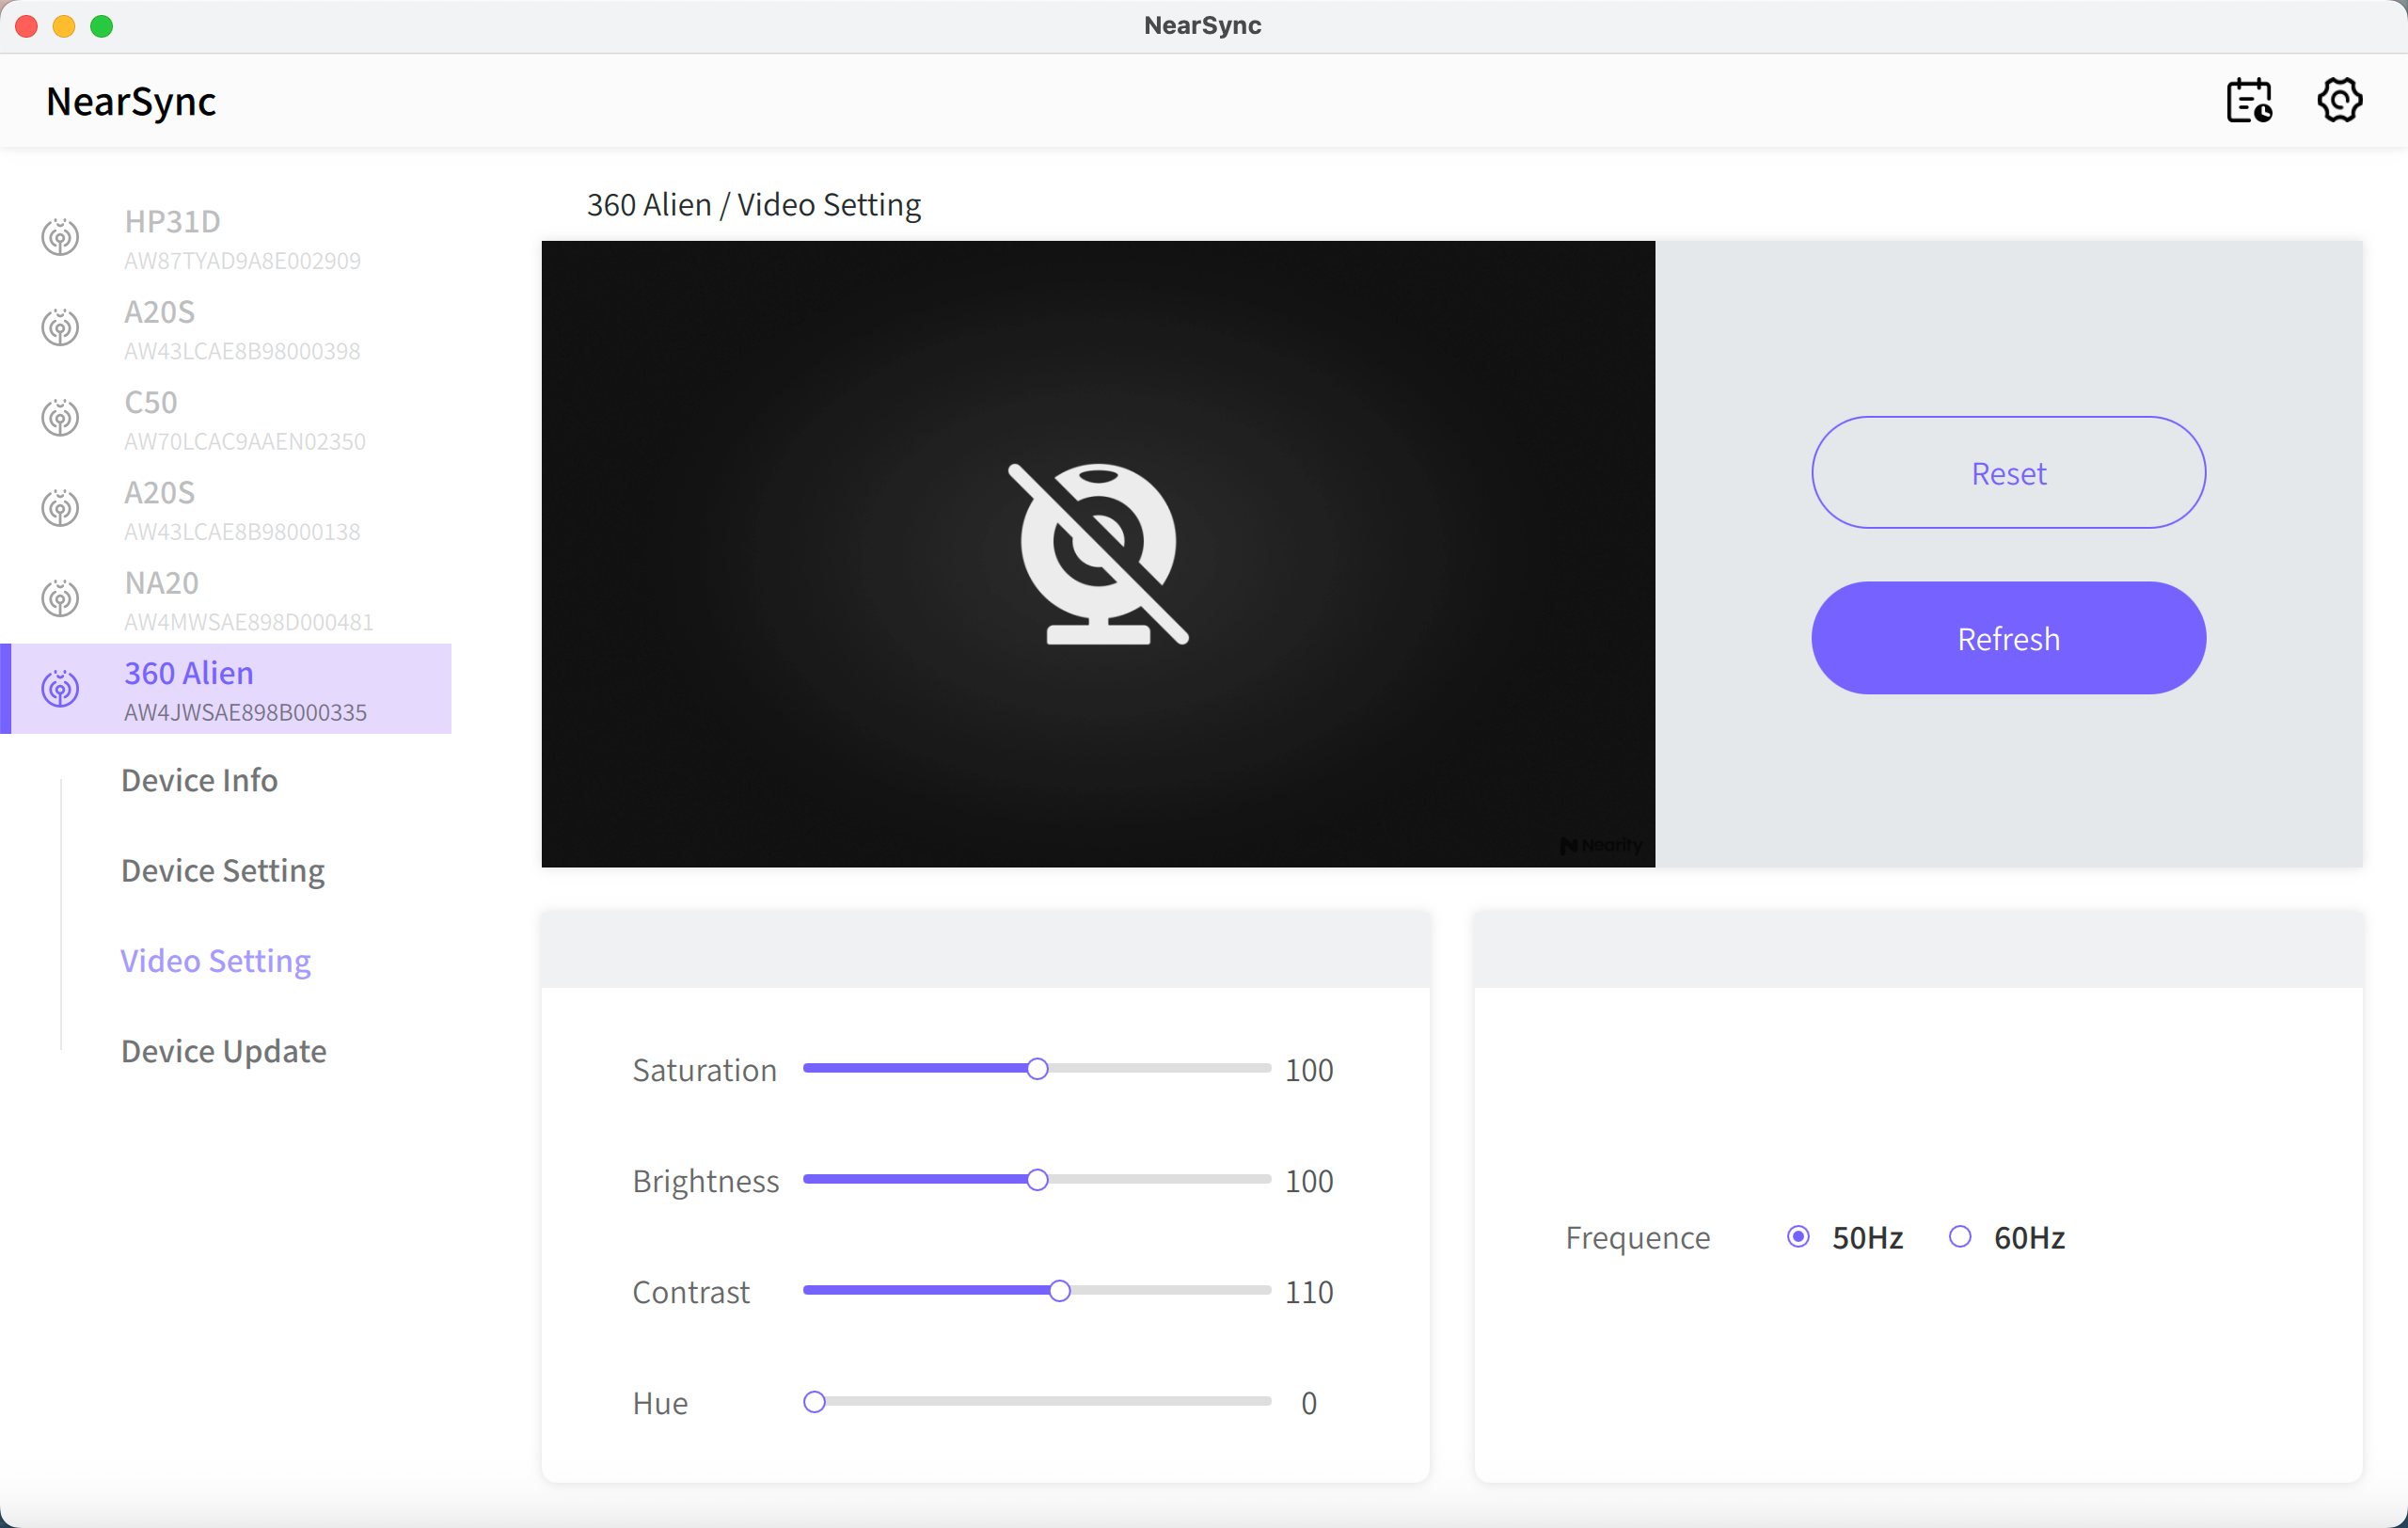
Select Refresh to reload the camera's current values. Select Reset to restore every slider to its default.
Device Setting (Advanced)
The Device Setting page controls on-device behavior:
- Flip-H — flips the image horizontally.
- Cam Mode — sets the default AI view mode (Discussion / Presentation / Global).
- Watermark — shows or hides the on-screen watermark.
- Osd Mirror — Mirrors on-screen display (OSD) information.
- Combo Key — Enables shortcut combinations for quick access to certain functions.
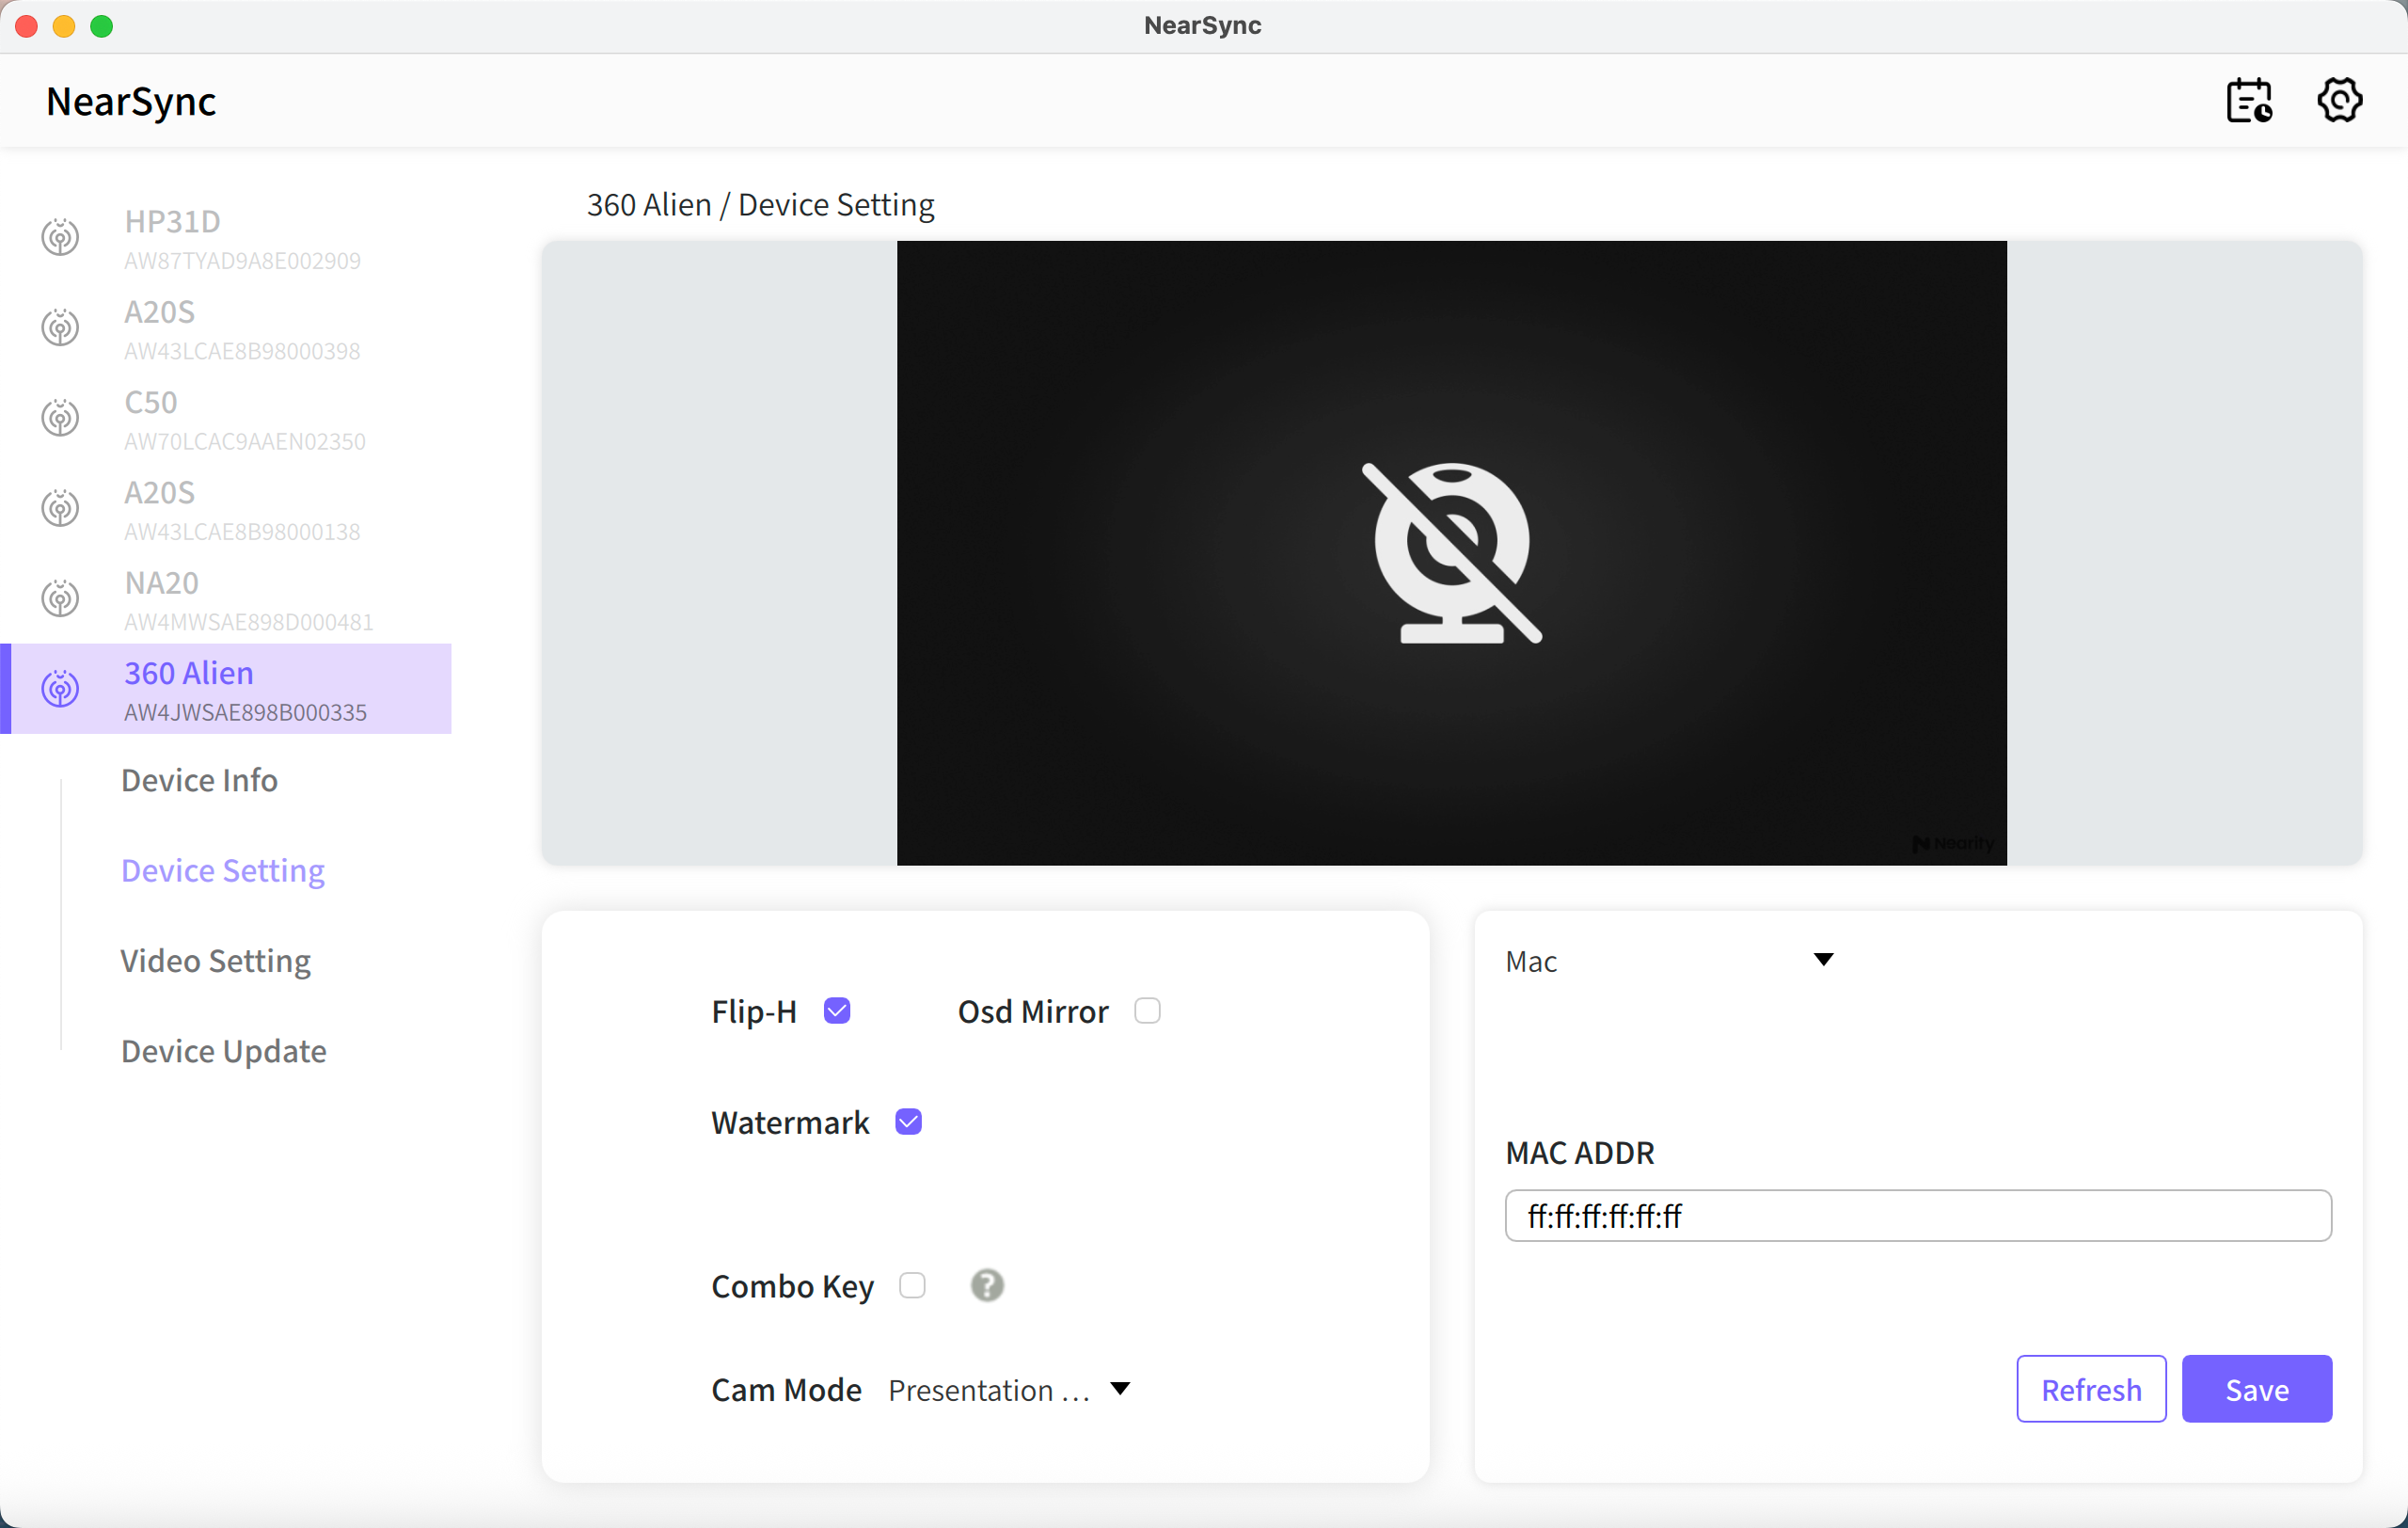
Select Save to apply changes.
Restore Default Settings
If the picture looks worse after adjustments, open Video Setting and select Reset — all sliders return to their defaults.
Frequently Asked Questions
Find answers to common questions about adjusting video settings in NearSync.
Why does my camera image look blue?
The color cast usually comes from your room lighting. Open Video Setting and move the Hue slider slowly until whites look neutral. If the picture only turns blue in the afternoon, changing daylight is the likely cause — re-check Hue before adjusting anything else.
Why do faces look dark against a bright window?
This is backlighting. Open Video Setting and raise Brightness until faces look clear. If possible, also reduce direct light behind the seats — for example, close the blinds facing the camera.
The video flickers or shows moving bands — why?
The Frequence setting does not match your local mains frequency. Open Video Setting and select 60 Hz in the US, or 50 Hz in Europe and most of Asia. The flicker or banding should disappear immediately.
The picture looks worse after my adjustments — what now?
Open Video Setting and select Reset at the top of the page — every slider returns to its default value. You can then start again from a clean baseline.
Can I adjust microphone or speaker volume in NearSync?
The current version of NearSync does not include audio adjustment — settings pages are available for Nearity 360 Alien and Nearity 120 Max only, and cover video and device options. To change volume during a call, use the controls in your meeting platform. If you need further help, contact NearHub Support at support@nearhub.us.
If You Still Need Help
If the steps above do not resolve the issue, please contact NearHub Support at support@nearhub.us.
How did we do?
How to Update Firmware in NearSync