Table of Contents
How to Set Up and Use Digital Signage on NearHub Board (Windows System)
This guide explains how to set up and use Digital Signage on the NearHub Board S Pro Series and NearHub Board Max Series running Windows 11 Pro. Digital Signage allows you to display company announce…
Table of Contents
This guide explains how to set up and use Digital Signage on the NearHub Board S Pro Series and NearHub Board Max Series running Windows 11 Pro.
Digital Signage allows you to display company announcements, images, schedules, and other information on your NearHub Board when it is not being used for meetings.
Step 1: Open Digital Signage
- Turn on your NearHub Board and make sure it is connected to the internet.
- Open NearHub Launcher.
- Locate and open the Digital Signage feature. A binding code will appear on your Board for device registration.
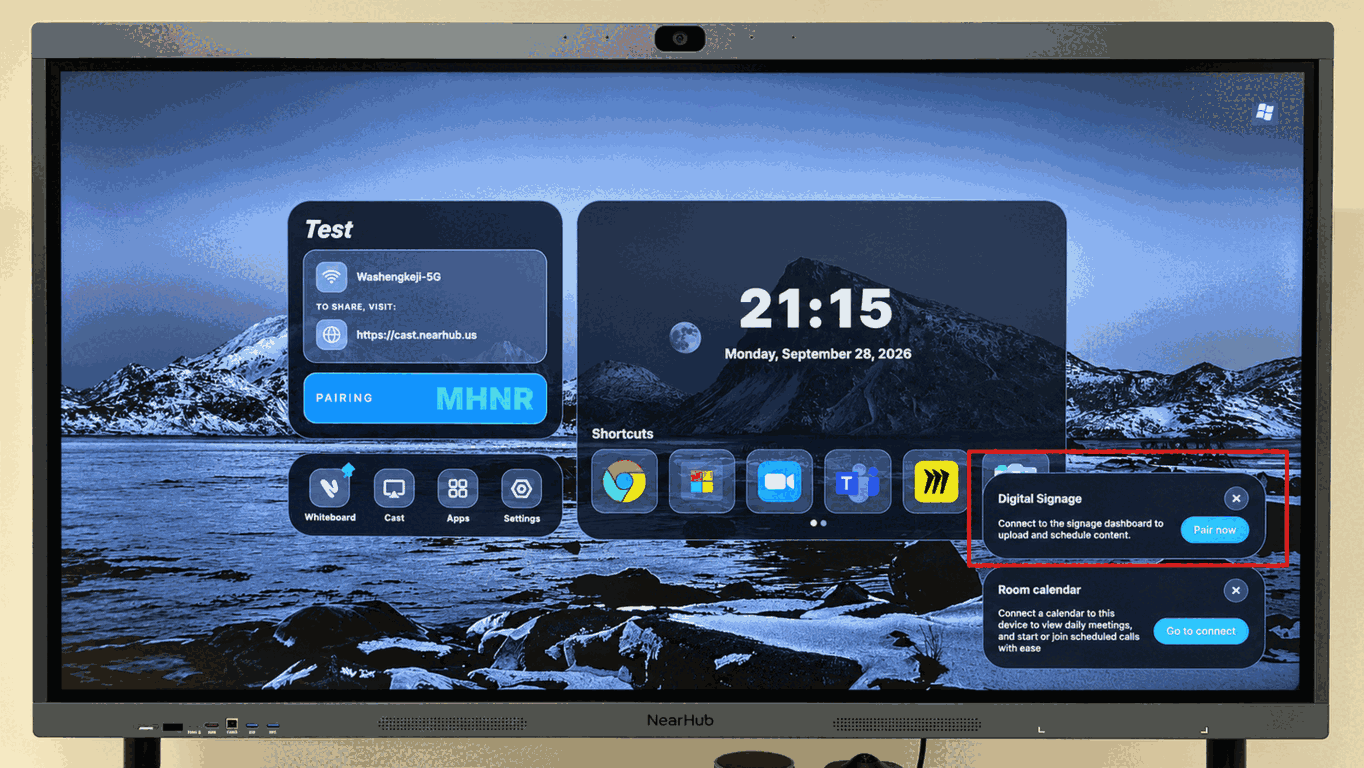
Step 2: Bind Your NearHub Board
Before managing Digital Signage content, you need to link your NearHub Board to your management account.
- Visit cloud.nearhub.us to register for a new account.
- After logging in, click Add NearHub and enter the binding code displayed on your Board to complete the device binding process.
- Once binding is complete, verify that your Board appears in the device management interface.
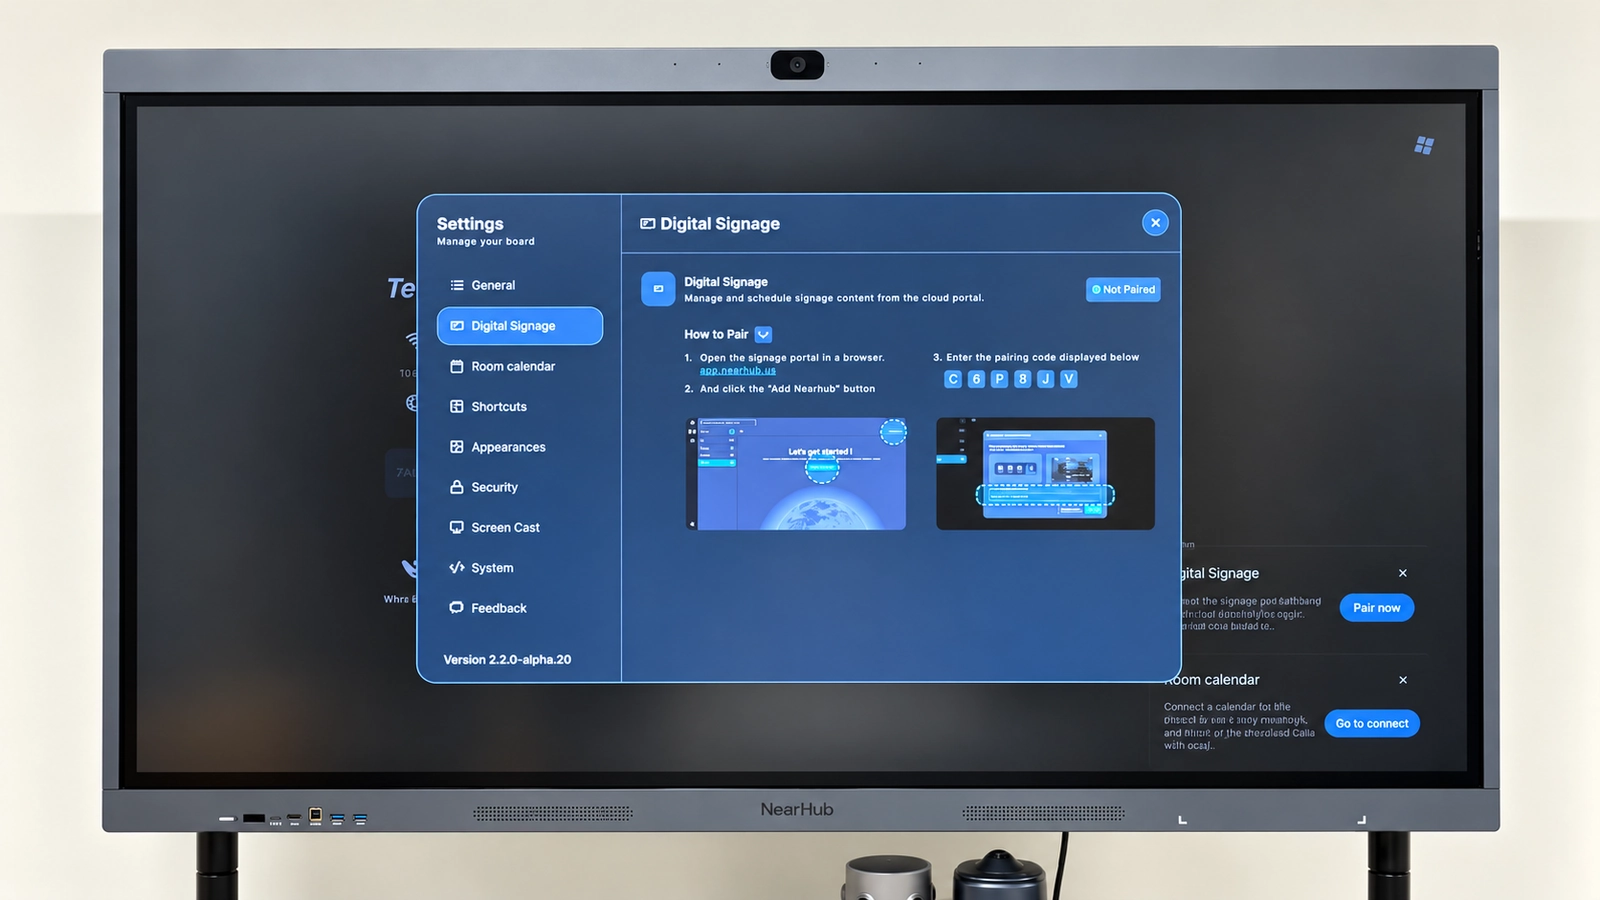
Step 3: Set Up Your Digital Signage Content
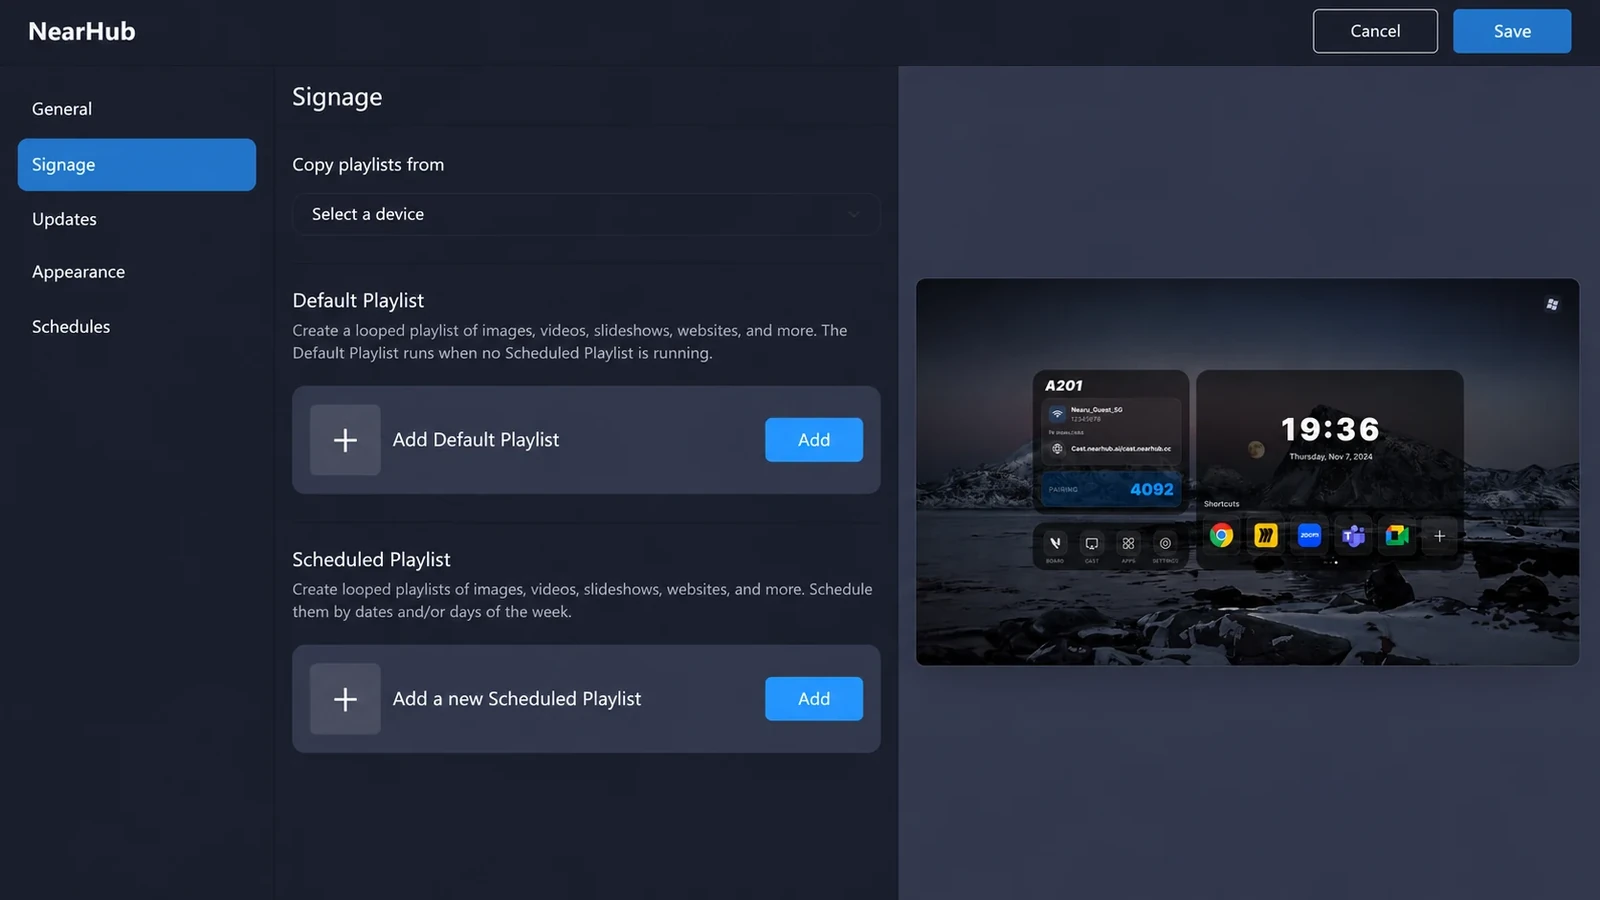
- Select your connected NearHub Board and go to Signage.
- Under Default Playlist, click Add to create a playlist with images, videos, slideshows, or websites.
- To create a scheduled playlist, click Add under Scheduled Playlist and follow the on-screen instructions.
- Click Save to apply your settings.
Note: The Default Playlist will automatically play when no Scheduled Playlist is running.
Step 4: Customize Digital Signage Appearance
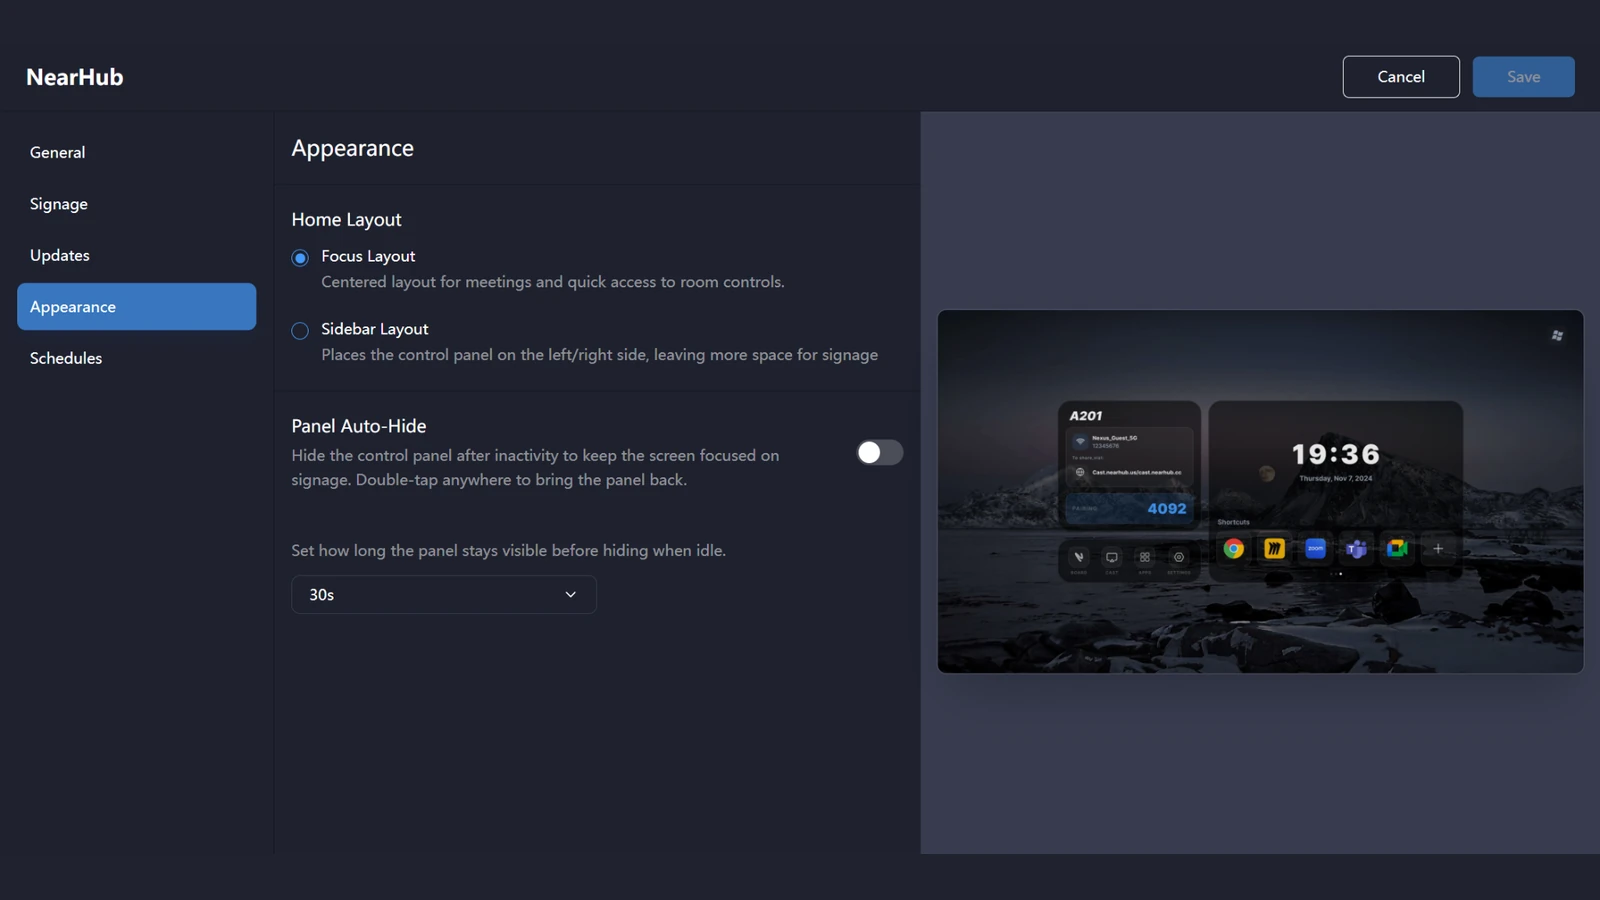
- Go to Appearance in the left-hand menu.
- Choose Focus Layout or Sidebar Layout based on your preference.
- Enable Panel Auto-Hide and select the desired delay (e.g., 30 seconds). Double-tap anywhere on the screen to bring the control panel back.
- Click Save to apply your settings.
Step 5: Unbind Your NearHub Board
If you need to remove your Board from your account or bind it to another account, follow these steps:
- Sign in to cloud.nearhub.us.
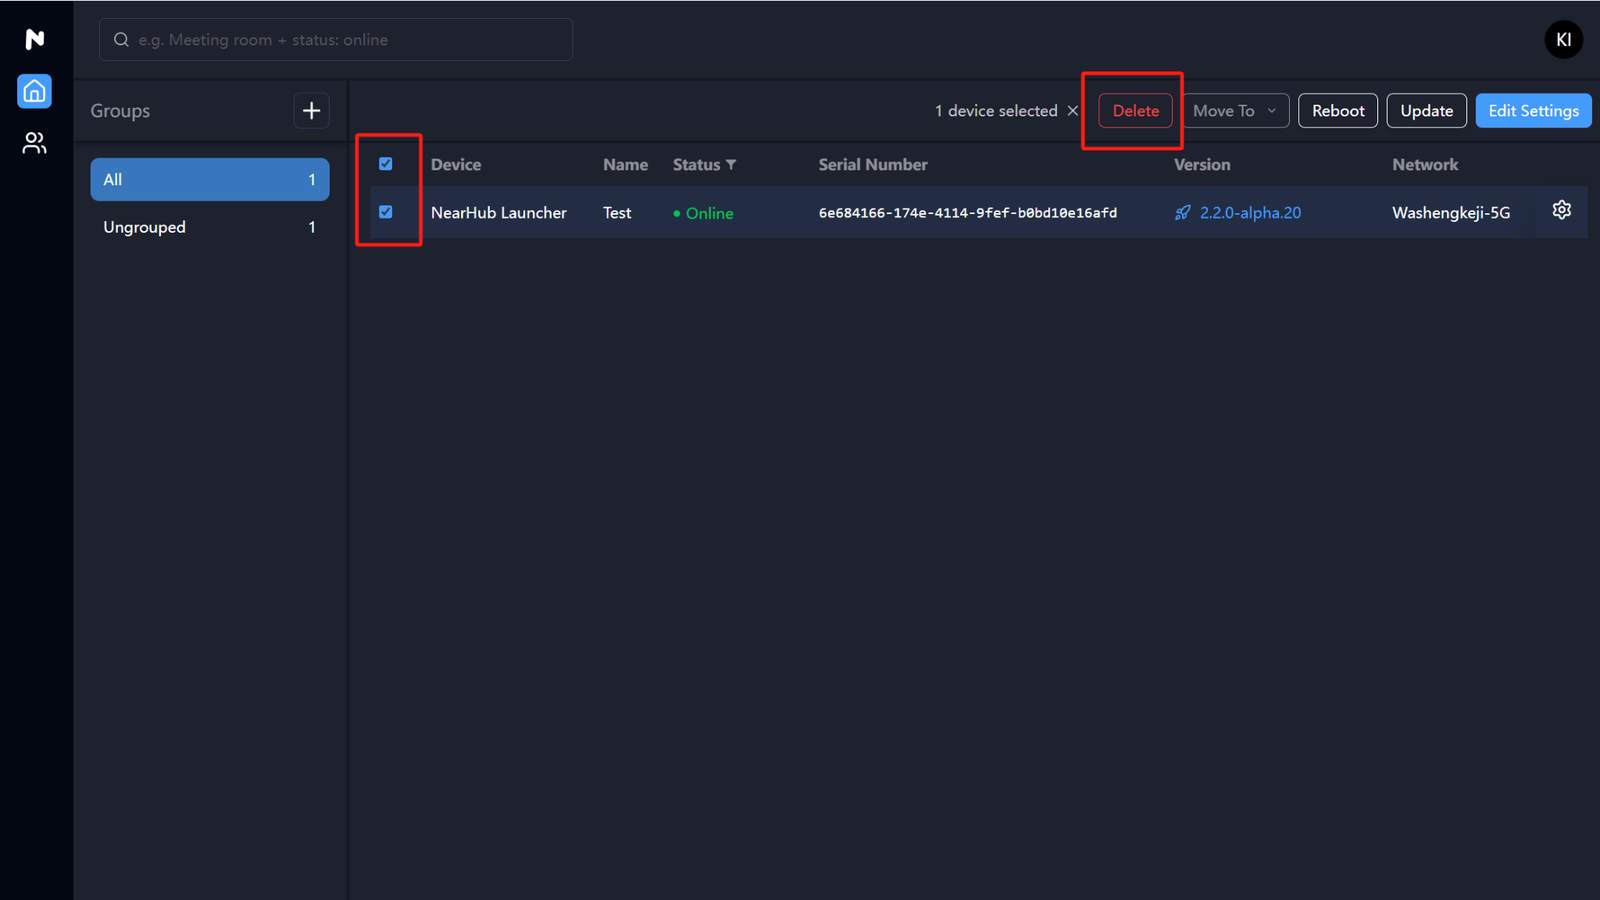
- In the device management interface, select the NearHub Board you want to unbind by checking the box next to it.
- Click Delete at the top of the device list.
- Confirm the deletion to complete the unbinding process.
If You Still Need Help
If the steps above do not resolve the issue, please contact NearHub Support at support@nearhub.us.
How did we do?
How to download and install Apps on Windows-Based NearHub Board?