How to Connect the NA20 Wireless Dongle to Nearity Conference Camera.
Learn how to connect and pair the NA20 Wireless Dongle with Nearity 360 Alien or 120 Max, configure your meeting app, and troubleshoot common issues.
The NA20 Wireless Dongle connects your computer to the Nearity camera wirelessly, reducing cable clutter and allowing more flexible camera placement.
Before You Begin
Make sure that:
- The Nearity camera is connected to power and turned on.
- The NA20 Wireless Dongle is available.
- Your computer is turned on.
- Your meeting application is installed and ready to use.
The NA20 replaces the direct USB connection between the camera and your computer. The camera must still remain connected to power.
Step 1: Connect the NA20 to your computer
Insert the NA20 Wireless Dongle into an available USB port on your computer.
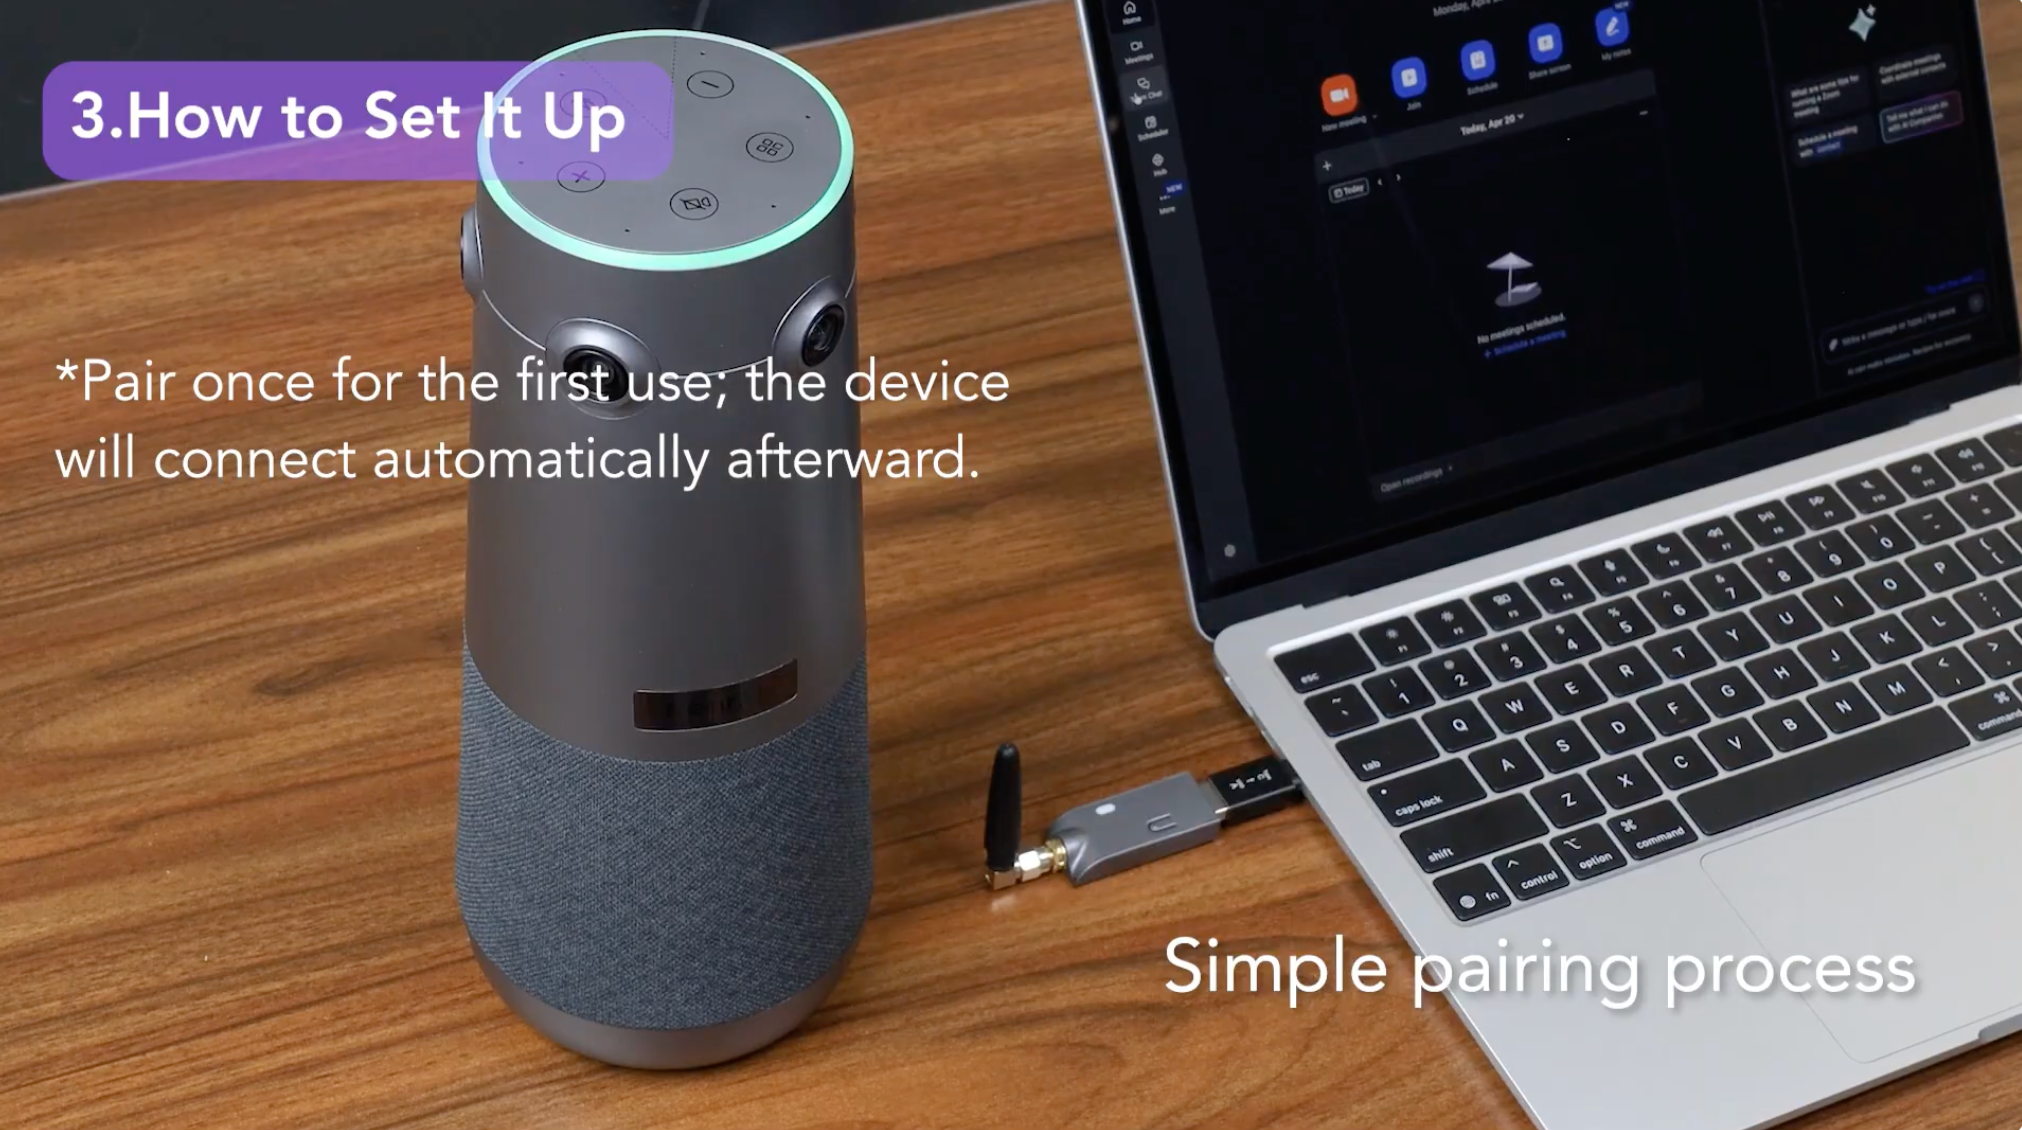
Step 2: Pair the wireless dongle
Press and hold the Mode button on the Camera for approximately three seconds.
The indicator light will begin flashing green while the dongle searches for the Nearity meeting device.
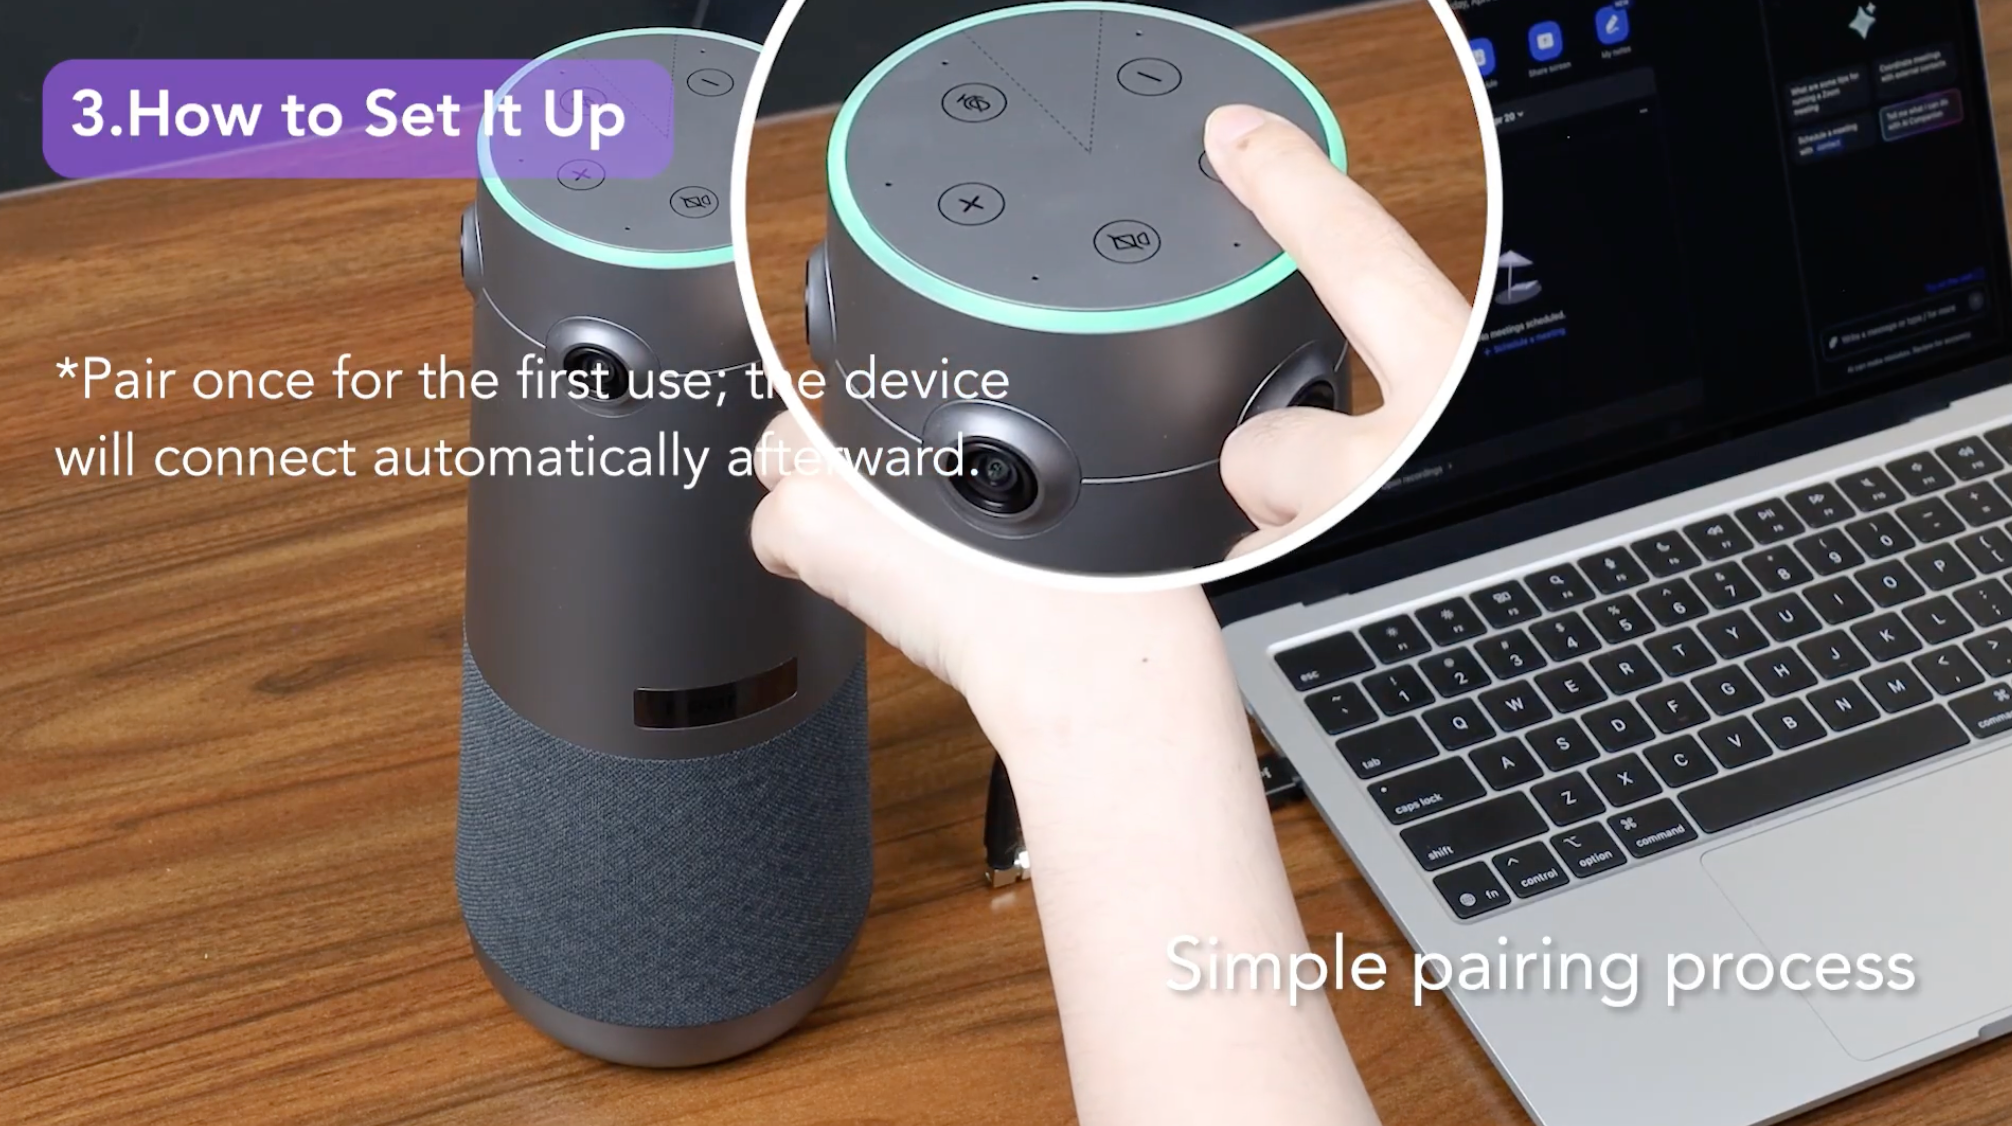
Step 3: Wait for the connection confirmation
Wait until:
- The indicator light stops flashing and turns solid green.
- You hear a voice prompt confirming the connection.
The NA20 is now paired with your Nearity 360 Alien or Nearity 120 Max.
Do not remove the dongle while the connection is being established.
Step 4: Select the Nearity device in your meeting application
Open your meeting application, such as Zoom, Microsoft Teams, Google Meet or Webex.
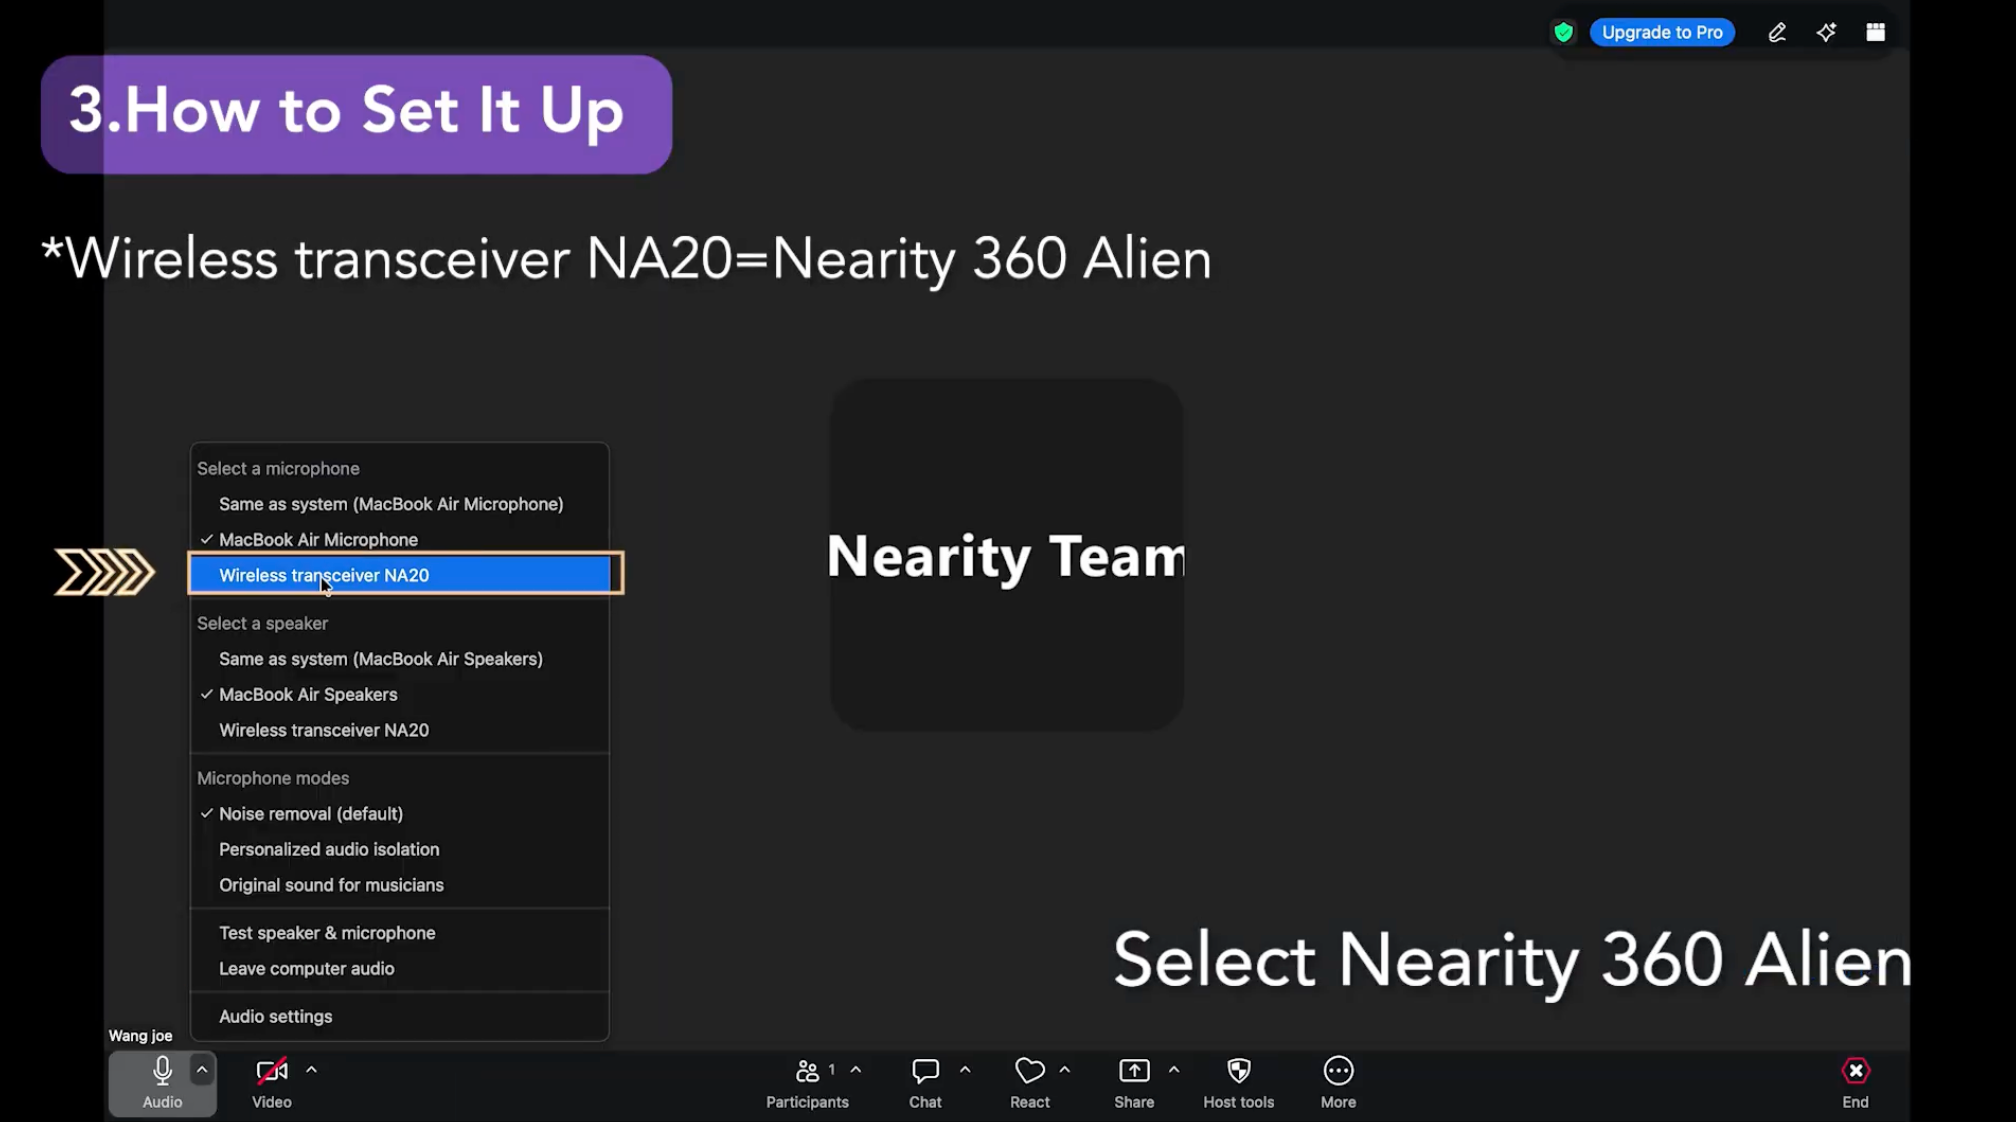
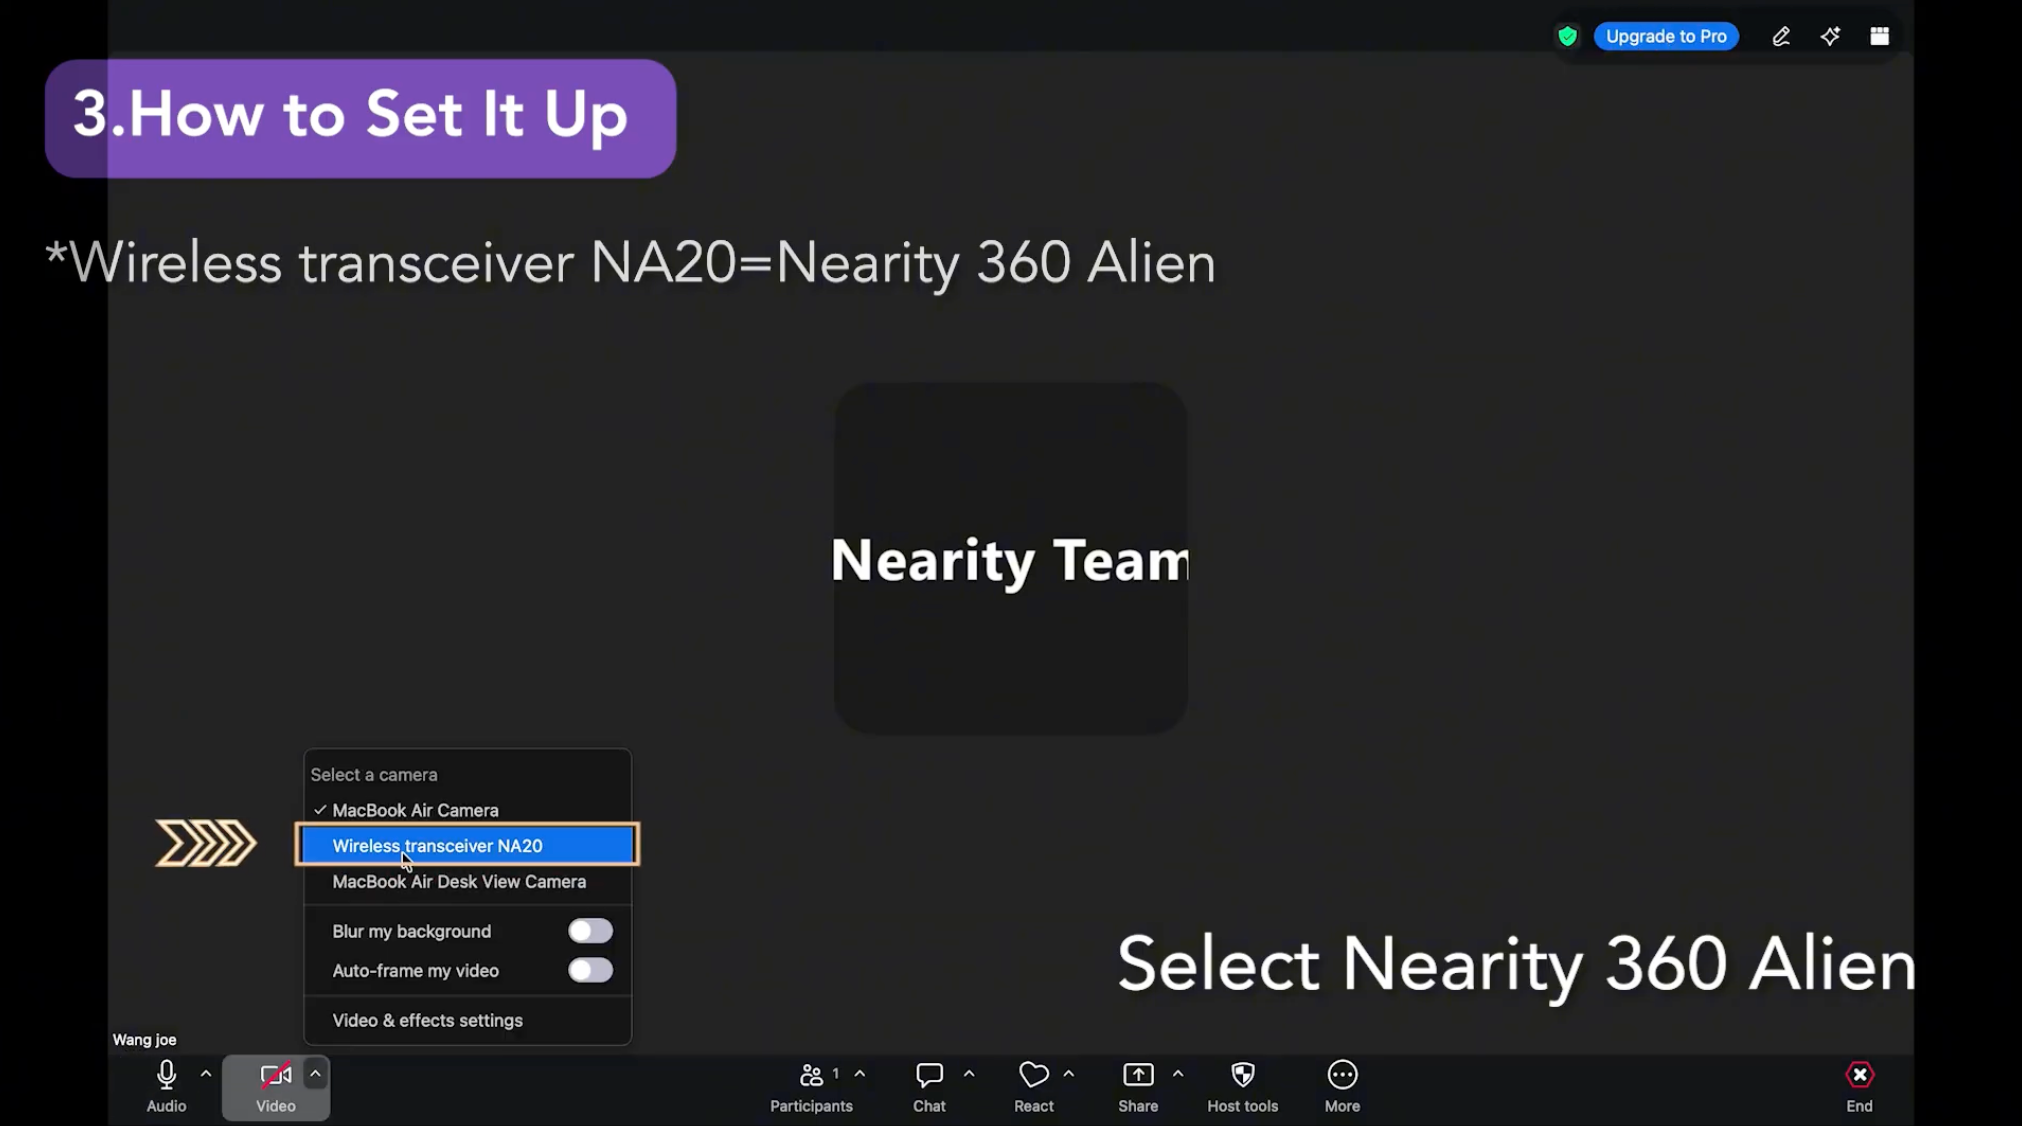
Go to the application’s audio and video settings, then select your Nearity device as the:
- Camera
- Microphone
- Speaker
Step 5: Test the connection
Before joining a meeting:
- Check that the camera preview is visible.
- Speak and confirm that the microphone level responds.
- Play a test sound to confirm that audio comes from the Nearity device.
- Start or join your meeting.
Your Nearity meeting device is now ready to use through the NA20 Wireless Dongle.
Troubleshooting
Open the issue that matches what you see.
The NA20 indicator does not turn on
Remove and reconnect the NA20. If the light remains off, try another USB port and confirm that the port works with another device.
The indicator keeps flashing
Confirm that the camera is powered on. Reconnect the NA20, then press and hold the camera's Mode button for approximately three seconds. Restart the camera and repeat the pairing if needed.
The NA20 does not appear in the meeting application
Connect the NA20 before opening the meeting application. Close and reopen the application, check the camera and microphone permissions, then look for Wireless transceiver NA20 again.
Video works, but audio does not
Open the application's audio settings. Confirm that Wireless transceiver NA20 is selected as both the microphone and speaker.
If You Still Need Help
If the steps above do not resolve the issue, please contact NearHub Support at support@nearhub.us.
How did we do?
How to Set Up USB-C&A Connection on Nearity Conference Camera.